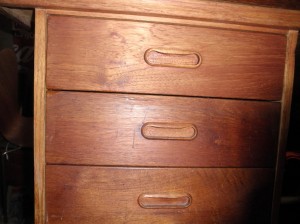
 I’m posting this topic in response to the one thing I get asked most about, How to restore these increasingly valuable pieces. Having been a restorer of furniture for a long time I have learnt some great techniques to help preserve these pieces. It could easily be used for any Danish or Danish modern, 20th century, or similar furniture.
There are some basic things to check before purchasing teak tables and cabinets:
-Are the large panel areas free from large or multiple chips and deep scratches
-Is the substrate (usually chip board / particle board) free from water damage- this shows up as expanded area
-Has someone before you sanded deeply showing signs that the veneer has been sanded through
-Is the finish original- sometimes dark stain is put over the original to hide damage or stains
-Are the trims still all attached.
YOU WILL NEED
– Metholated spirit
-Rags (cotton)
-Steel wool grade 2 and 00
-Sandpaper 180, 240 and 320 grit
-Sanding block
-Shellac, Danish oil, teak oil etc.depending on desired product
-Brush (optional)
-coloured furniture wax crayons (optional)
If any of these things are present it will be difficult to achieve a perfect result. If you are thinking of purchasing furniture with any of these faults be careful as you probably won’t get your desired result. If you are happy to have a few faults and don’t pay too much they can still be good furniture.
The way I would start any piece of 20th century teak furniture would be to wash the piece down with mentholated spirits with a grade 2 steel wool, this dislodges the grime and original shellac or cellulose lacquer. The liquid needs to be wiped up with cotton rag before it resets.
Leave the piece to dry and then lightly hand sand the surface with the grain using a 180 grit sand paper. Repeat the process using 240 the 320 grit paper on a hard sanding block. Never use an electric sander if you are not a pro- it is too easy to sand through the thin veneer (sometimes not even 1 mm thick).
When you have got to this point it is worth washing the surface down with Metho again and you should see something similar to your final colour, but any remaining finish should show up as a different colour. Be careful that lighter colour isn’t over sanding through the veneer and never heavily sand a dent or scratch. Small scratches can be raised by wiping a wet cloth over the area for very short periods – never leave them wet as it will ruin the veneer.
Once you have your surface ready you need to choose a finish, Shellac is the traditional finish but is not as resilient as modern urethanes but is easier to repair if it goes wrong. A “hard” shellac is available and is a good option as are some Danish oils which are a urethane based product. The best way to apply the new finish is with a folded rag soaked and rung out then applied with the grain evenly. If your brave and steady use a brush -sash cutters are good.
At this point you should be able to see any chips etc. these can be filled with a wax crayon melted into the small hole etc. This should be done between the coats of finish to seal the wax in. If you do the wax on raw wood it can soak in and stain the area.
It should only need a couple of coats to achieve a nice satin effect. If using shellac it is worth cutting back the surface with a grade 00 steel wool between coats. A good way to protect the surface is to then wipe over with Natural teak oil, a thin oil that builds up slowly but is a good protective coat and dusts off the cutting back dust.
Please use this as a guide and is only intended to show how we do it -any one attempting their own restoration should follow the manufacturers instructions on the cans. Always wear protection when doing any restoration work and do so at your own risk, we take no responsibility for damage or injury caused.
Good luck and I will post more on repairing these pieces in the near future.